Hey guys, sorry for the late posting! This will be the last time I'm sharing! (:
This time I am going to talk about the quantitative determination of G6PD on an analyzer, which is currently undergoing evaulation.
Principle
The principle of the assay is to utilize G6PD (that is present in the RBCs) that catalyzes the oxidation of glucose-6-phosphate (G6P) to 6-Phosphogluconolactone (6PG). This takes place in the presence of NADP, which will be reduced to NADPH. The NADPH produced will then react with a colour reagent to produce a fluorescence that will be measured colourimetrically at 550nm.
What is G6PD
G6PD is an important cytoplasmic enzyme that is found in cells and plays a crucial role in reducing the oxidative effect of the free radicals on the RBCs. It is involve in the first step of the hexose-monophosphate pathway (HMP) to produced NADPH, which is essential in maintaining the integrity of the RBCs membrane. Hence, with a deficiency of this enzyme, the RBCs are prone to lysis due to the oxidative stress. And this may lead to hemolytic anaemia.
Why do this test?
An awareness of G6PD deficiency had been raised many years back in Singapore. Hence, all newborns will be screened for this deficiency. And of course, the samples used for this test will be all cord blood samples.
How does the assay work?
First, all the samples will be transferred manually into eppendorf tubes and loaded onto the analyzer. Next, an elution buffer will then be added to the blood to lyse the RBCs. This is to bring out the enzyme, if it is present. The reagent solution is then added for the production of NADPH in the presence of G6PD. After which, the colour reagent will be added for colour production if NADPH is produced. Incubation will take place before the absorbance reading is taken.
The quantitative results will then be calculated after the readings are entered onto Excel. For deficient samples, they will be re-run again to confirm whether if the enzyme is really absent.
That should be all! (: Feel free to ask me any questions, I will try my best to answer them.
Posted by: Tan Siew Ming
0702862D
Showing posts with label Siewming. Show all posts
Showing posts with label Siewming. Show all posts
Monday, October 26, 2009
Tuesday, September 15, 2009
Biochemistry Lab
Hi there, I am here to share again, and I would also like to apologise for the late posting!
Fecal Occult Blood Test
This test is a non-evasive test that detects occult (hidden) blood in the stool samples. The occult blood test can be used to screen for any bleeding along the gastrointestinal tract and also for colon cancer.
Materials used:
Hemoccult Sensa Test Kit which comprises of 2 main component:
1) Hemocult Sensa Slides : Test cards containing the guaiac paper.
2) Hemocult Sensa Developer: A developing solution that contains a stabilized mixture of hydrogen peroxidase (42%), 80% ethyl alcohol and enhancer in aqueous solution.
Principle of Test:
The Fecal Occult Blood test is based on the oxidation of guaiac by hydrogen peroxidase into a blue compound. The heme portion of hemoglobin (if present in the fecal specimen) has peroxidase activity which will catalyze the oxidation of alpha-guaiaconic acid (an active component of the guaic paper) by hydrogen peroxidase. Hence, forming a highly conjugated blue quinone compound.
Method:
 1) Label the test card with the patient's sticky label
 2) Open up the test card, there will be 2 boxes A and B.
 3) Using the wooden applicator, collect a small amount of fecal sample of the patient.
4) Apply a thin smear in box A.
5) Re-using the same applicator, obtain a second sample from a different part of the fecal sample. Apply a thin smear in Box B.
6) Close the cover flap and flip the card backwards. 7) Open the flap on the back of the card. There will be (i) an area to allow the developer to drop
directly on the smear, (ii) a Performance monitor area that consists of a positive and negative control.
 8) Apply 2 drops of the Hemoccult SENSA Developer onto the guaiac paper directly over the smears.
9) Apply 1 drop of the Hemoccult SENSA Developer between the positive and negative performance monitor areas. Results:
10) For the test, results must be read within 60 seconds. Any trace of of blue at or on the edge of the smear, the test is considered positive for occult blood.
11) For the performance Monitor, results have to be read within 10 seconds. If the test slide is functional, a blue colour will appear on the positive performance monitor area and no blue for the negative performance monitor area.
* In this case, the test card is functioning well, and the test is negative for occult blood. i.e the patient do not have occult blood.
Note
To avoid false positive results:
*Sample should not be collected when patient is having menstruation.
*Patient should aviod taking red meat (beef, lamb, liver) 3 days before stool collection.
*All pictures are taken and posted after permission granted by my supervisor.
Posted By: Tan Siew Ming
0702862D
Friday, August 7, 2009
Hematology (:
Hey people! This is Siew Ming here to post again (:
I am going to post about my experience when I was attached to the Hematology lab.
Basically, the hematology lab is being divided into two sections: 1) Stat lab where emergency samples were being handled and 2) Routine lab whereby routine processing of blood samples are carried out.
I got the chance to observe and participate in the various tests that are carried out in the lab, such as FBC, ESR, reticulocyte Test, Kleihaur Batek Test and APPT/PT. Besides these, I felt fortunate to be taught to recognize and differentiate the different types of blood cells under the microscope by a very senior med tech! (:
Today, I’m going to share about the techniques of Erythrocyte Sedimentation Rate (ESR). ESR is a screening test used to detect inflammation. However, confirmatory tests have to be carried out to confirm the diagnosis. ESR refers to the rate at which the red cells sediment over time. It is often measured in mm/H. ESR will increase when there is infection, pregnancy, SLE, Anaemia, etc.
For a single ESR test, a minimum of 350ul of venous blood will be collected in an EDTA tube. Before performing the test, it is very crucial to check for visible clots of the blood. This is because clotted samples cannot be processed and the results will be inaccurate and not valid.
Steps:
1. EDTA blood sample is mixed well by inverting the tube several times.
2. 320ul of blood from the EDTA tube is transferred into a Aquisel Tube (filled with Trisodic Citrate 0.106M)
3. The Aquisel tube is then mixed for at least 12 times.
4. A pipette is then introduced into the Aquisel tube through a twisting the pipette in a circular motion, and gradually push the pipette downwards to allow blood to fill the pipette. The blood level should reach the “0” marking on the pipette.
5. The pipette, together with the Aquisel tube is left to stand on a Styrofoam Aquisel Tube holder for 50 mins.
6. Results (no. of mm the cells have fallen) were read at the end of 50min.
7. Results were then recorded into the ESR record book, patient’s request form and LIS verification system.
The expected ranges should be:
Neonates (1-2days): 0-4
Neonates (3 days-1 month), children (2 months – 12 years), and adults (more than12 years): 0-10
I think there is something wrong with blogger these few days. As it doesn’t allow me to post pictures, here’s a link to show how do Aquisel tubes and pipette look like: http://www.swissvacuum.com/products/selecta/Biology_and_histology_equipment/DivisionAnalytique.pdf
Sunday, July 5, 2009
Cytology Lab
Posted by: Tan Siew Ming 0702862D
Hey people! I'm here to share about my SIP experience of the 1st week! (:
As for the first 3 days of the first week, I was attached to the Cytology Department. Cytology is the analysis of cells to diagnosis diseases. The lab deals with 2 types of specimens : 1) Gynaecological Specimens and 2) Non-gynaecological Specimens.
Gynaecological specimens refer to Pap Smear of the cervix, while non-gynaecological specimens refer to fine needle aspirations (FNA) and bodily fluids collected.
Examples of the bodily fluids collected can be: Urine, Pleural, Pericardial and Peritoneal washings. And, FNA can be from the thyroid, lymph nodes, breast, bones, etc.
The routine process of the lab upon receiving the specimens is:
Maintaining of the specimens on the computer (that is to generate an access code/individual code for each specimen) -> generate the label sticker for labelling of the specimens-> processing ->staining-> mount-> screening of cells under the microscope.
1) Processing of Gynaecological specimens (Pap smears)
Pap smear is a screening test that determines any abnormalities of the cervical cells that may lead to cervical cancer. The aim of a pap smear is to detect any Cervical Intraepithelial Neoplasia (CIN) caused by the Human Papilloma Virus (HPV).
Basically, there are 3 different grades of CIN: CIN I- mild dysplasia, CIN II- moderate dysplasia, CIN III- severe dysplasia.
There are 2 ways if preparing and processing pap smears: 1) Conventional method, and 2) Liquid-based cytology.
The conventional pap smear method is carried out by collecting the cervical cells using a spatula or endobrush, then smearing the cells directly onto a glass slide. Next, the slide is fixed immediately with alcohol spray. This immediate fixing is to prevent drying artifact from happening. However, the conventional method is not widely use anymore because the smear may contain other debris like blood, mucosal or inflammation cells. Also, it produces a thick layer of cells that are overlapping each other, thus, affecting the efficiency and accuracy of the screening process.
These are the instruments involved in a ThinPrep Pap Test:

From left: Spatula, endobrush
Picture taken from: http://www.imvs.sa.gov.au/tissuepath/graphics/spatula_conventional.jpg

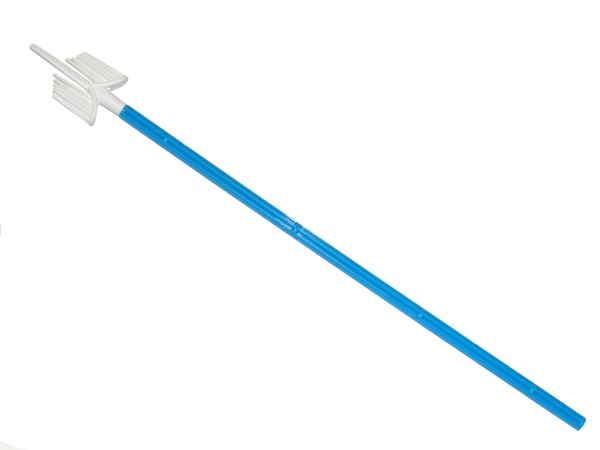
Broom-like Brush
Picture taken from: http://www.cervexbrush.com/images/CombiLong.jpg

Vial with preservative fluid
Picture taken from: http://www.labnews.co.uk/cms_images/Image/Prod-Dec-07/31-NOV.jpg

Inside of the ThinPrep Processor
Picture taken from: http://cyto.igabinet.pl/data/user_files/image/TP%20Processor%202.JPG

Slide produced from ThinPrep
Picture taken from: http://www.muliabrothers.com/Picture1TP.jpg

Difference in the quality of the slides produced by Conventional and ThinPrep method
Picture taken from: http://imaginis.com/graphics/cervical-cancer/pap_smear.gif
An endobrush, spatula or broom-like brush will be used to collect the cervical cells. After which, the brush will be rinsed vigorously in a vial containing preservative fluid. The vial will then be loaded into the ThinPrep machine for processing.
A suction filter will be inserted into the vial to filter the cells, separating the cervical cells from any debris, blood, mucosal or inflammatory cells. The cervical cells will then be imprinted on the glass slide. After which, the machine will gently drop the slide into 95% xylene for fixing. After fixation, the slides will go through pap staining in the autostainer, Leica Autostainer XL. The slides will then be mounted and screened under the microscope for any abnormalities.
2) Processing of Non-gynaecological specimens
The processing of non-gynae specimens is quite different from gynae specimens.
First of all, the specimens will undergo cytospin to obtain the pellet. To the pellet, cytospin collection fluid (light green colour) will be added to the cells. The amount the fluid to be added depends on the size of the pellet, i.e the fluid added must be at least twice the amount of the size of the pellet. A pipette was then used to mix up the mixture.
After these, a cytofunnel chamber is prepared. A glass slide, together with a filter card are attached to the cytoclip and cytofunnel. The whole cytofunnel chamber is then loaded into the cytospin. Due to the pressure from the spinning motion in the cytospin, the cells will be imprinted in the slide, according to the size of the filter card. Similarly, the slides will be stained in an autostainer.
Although both gynae and non-gynae specimens are stained with the same stains, they are stained in different autostainers. This is to prevent contamination of the different types of specimen. After staining, the slides will be mounted and screened under the microscope for abnormalities.

Process of assembling the cytofunnel chamber
Picture taken from: http://www.thermo.com/eThermo/CMA/PDFs/Various/File_24579.pdf
In the cytology lab, all equipments used will be disinfected with reagent CIDEX OPA. For the other disposable equipments like pasteur pipette and supernatants, they will be disinfected and discarded into a small bin of dissolved chlorine tablet.
Hey people! I'm here to share about my SIP experience of the 1st week! (:
As for the first 3 days of the first week, I was attached to the Cytology Department. Cytology is the analysis of cells to diagnosis diseases. The lab deals with 2 types of specimens : 1) Gynaecological Specimens and 2) Non-gynaecological Specimens.
Gynaecological specimens refer to Pap Smear of the cervix, while non-gynaecological specimens refer to fine needle aspirations (FNA) and bodily fluids collected.
Examples of the bodily fluids collected can be: Urine, Pleural, Pericardial and Peritoneal washings. And, FNA can be from the thyroid, lymph nodes, breast, bones, etc.
The
routine process of the lab upon receiving the specimens is:Maintaining of the specimens on the computer (that is to generate an access code/individual code for each specimen) -> generate the label sticker for labelling of the specimens-> processing ->staining-> mount-> screening of cells under the microscope.
1) Processing of Gynaecological specimens (Pap smears)
Pap smear is a screening test that determines any abnormalities of the cervical cells that may lead to cervical cancer. The aim of a pap smear is to detect any Cervical Intraepithelial Neoplasia (CIN) caused by the Human Papilloma Virus (HPV).
Basically, there are 3 different grades of CIN: CIN I- mild dysplasia, CIN II- moderate dysplasia, CIN III- severe dysplasia.
There are 2 ways if preparing and processing pap smears: 1) Conventional method, and 2) Liquid-based cytology.
The conventional pap smear method is carried out by collecting the cervical cells using a spatula or endobrush, then smearing the cells directly onto a glass slide. Next, the slide is fixed immediately with alcohol spray. This immediate fixing is to prevent drying artifact from happening. However, the conventional method is not widely use anymore because the smear may contain other debris like blood, mucosal or inflammation cells. Also, it produces a thick layer of cells that are overlapping each other, thus, affecting the efficiency and accuracy of the screening process.
Instead, the Liquid-based cytology is being adopted now. This method employs the use of a machine known as ThinPrep processor. The processor will cleverly differentiate and separate the cervical cells from any debris, blood, mucous and inflammation cells. Another advantage of this processor is that it creates uniform and even layer of cells.
These are the instruments involved in a ThinPrep Pap Test:

From left: Spatula, endobrush
Picture taken from: http://www.imvs.sa.gov.au/tissuepath/graphics/spatula_conventional.jpg

Broom-like Brush
Picture taken from: http://www.cervexbrush.com/images/CombiLong.jpg

Vial with preservative fluid
Picture taken from: http://www.labnews.co.uk/cms_images/Image/Prod-Dec-07/31-NOV.jpg

Inside of the ThinPrep Processor
Picture taken from: http://cyto.igabinet.pl/data/user_files/image/TP%20Processor%202.JPG

Slide produced from ThinPrep
Picture taken from: http://www.muliabrothers.com/Picture1TP.jpg

Difference in the quality of the slides produced by Conventional and ThinPrep method
Picture taken from: http://imaginis.com/graphics/cervical-cancer/pap_smear.gif
An endobrush, spatula or broom-like brush will be used to collect the cervical cells. After which, the brush will be rinsed vigorously in a vial containing preservative fluid. The vial will then be loaded into the ThinPrep machine for processing.
A suction filter will be inserted into the vial to filter the cells, separating the cervical cells from any debris, blood, mucosal or inflammatory cells. The cervical cells will then be imprinted on the glass slide. After which, the machine will gently drop the slide into 95% xylene for fixing. After fixation, the slides will go through pap staining in the autostainer, Leica Autostainer XL. The slides will then be mounted and screened under the microscope for any abnormalities.
2) Processing of Non-gynaecological specimens
The processing of non-gynae specimens is quite different from gynae specimens.
First of all, the specimens will undergo cytospin to obtain the pellet. To the pellet, cytospin collection fluid (light green colour) will be added to the cells. The amount the fluid to be added depends on the size of the pellet, i.e the fluid added must be at least twice the amount of the size of the pellet. A pipette was then used to mix up the mixture.
After these, a cytofunnel chamber is prepared. A glass slide, together with a filter card are attached to the cytoclip and cytofunnel. The whole cytofunnel chamber is then loaded into the cytospin. Due to the pressure from the spinning motion in the cytospin, the cells will be imprinted in the slide, according to the size of the filter card. Similarly, the slides will be stained in an autostainer.
Although both gynae and non-gynae specimens are stained with the same stains, they are stained in different autostainers. This is to prevent contamination of the different types of specimen. After staining, the slides will be mounted and screened under the microscope for abnormalities.

Process of assembling the cytofunnel chamber
Picture taken from: http://www.thermo.com/eThermo/CMA/PDFs/Various/File_24579.pdf
In the cytology lab, all equipments used will be disinfected with reagent CIDEX OPA. For the other disposable equipments like pasteur pipette and supernatants, they will be disinfected and discarded into a small bin of dissolved chlorine tablet.
Subscribe to:
Posts (Atom)